Optimising Particles
Particles can often end up being quite resource-intensive within the context of a playable. Within this page we aim to provide tips, techniques and resources to lessen the strain on performance particles can end up creating.
Baking Particles
Let's start with the method that causes the least loss in quality, baking your particles into a series of pngs that can be used to create an animation.
There are a few factors to consider when deciding whether or not to go with this approach:
- Are the effects using regular shapes and quite small in size (width/height)?
- Are the effects not making use of physics? i.e. Are the particles not interacting with one another?
- Does the particle effect look similar between multiple simulations?
If the answer is yes to these questions this is likely the best approach for you. If not we have other methods towards the end of this page.
For this process we will be making use of a public script that takes screenshots of our scene and adds them to a folder at our project's root folder. You can find this script by clicking here, or alternatively by copying the code below.
CLICK HERE FOR SCRIPT
using UnityEngine;
using System.Collections;
using System.IO;

/*
Usage:
1. Attach this script to your chosen camera's game object.
2. Set that camera's Clear Flags field to Solid Color.
3. Use the inspector to set frameRate and framesToCapture
4. Choose your desired resolution in Unity's Game window (must be less than or equal to your screen resolution)
5. Turn on "Maximise on Play"
6. Play your scene. Screenshots will be saved to YourUnityProject/Screenshots by default.
*/

public class TransparentBackgroundScreenshotRecorder : MonoBehaviour {

#region public fields
[Tooltip("A folder will be created with this base name in your project root")]
public string folderBaseName = "Screenshots";
[Tooltip("How many frames should be captured per second of game time")]
public int frameRate = 24;
[Tooltip("How many frames should be captured before quitting")]
public int framesToCapture = 24;
#endregion
#region private fields
private string folderName = "";
private GameObject whiteCamGameObject;
private Camera whiteCam;
private GameObject blackCamGameObject;
private Camera blackCam;
private Camera mainCam;
private int videoFrame = 0; // how many frames we've rendered
private float originalTimescaleTime;
private bool done=false;
private int screenWidth;
private int screenHeight;
private Texture2D textureBlack;
private Texture2D textureWhite;
private Texture2D textureTransparentBackground;
#endregion

void Awake () {
  mainCam = gameObject.GetComponent<Camera>();
  CreateBlackAndWhiteCameras ();
  CreateNewFolderForScreenshots ();
  CacheAndInitialiseFields ();
  Time.captureFramerate = frameRate;
}

void LateUpdate () {
  if(!done){
    StartCoroutine(CaptureFrame());
  } else {
    Debug.Log("Complete! "+videoFrame+" videoframes rendered. File names are 0 indexed)");
  Debug.Break();
  }
}

IEnumerator CaptureFrame (){
  yield return new WaitForEndOfFrame();
  if(videoFrame < framesToCapture) {
    RenderCamToTexture(blackCam,textureBlack);
    RenderCamToTexture(whiteCam,textureWhite);
    CalculateOutputTexture ();
    SavePng ();
    videoFrame++;
    Debug.Log("Rendered frame " +videoFrame);
    videoFrame++;
  } else {
    done=true;
    StopCoroutine("CaptureFrame");
  }
}

void RenderCamToTexture (Camera cam, Texture2D tex){
  cam.enabled=true;
  cam.Render();
  WriteScreenImageToTexture(tex);
  cam.enabled=false;
}

void CreateBlackAndWhiteCameras (){
  whiteCamGameObject = (GameObject) new GameObject();
  whiteCamGameObject.name="White Background Camera";
  whiteCam=whiteCamGameObject.AddComponent<Camera>();
  whiteCam.CopyFrom(mainCam);
  whiteCam.backgroundColor=Color.white;
  whiteCamGameObject.transform.SetParent(gameObject.transform, true);

  blackCamGameObject = (GameObject) new GameObject();
  blackCamGameObject.name="Black Background Camera";
  blackCam=blackCamGameObject.AddComponent<Camera>();
  blackCam.CopyFrom(mainCam);
  blackCam.backgroundColor=Color.black;
  blackCamGameObject.transform.SetParent(gameObject.transform, true);
}

void CreateNewFolderForScreenshots (){
  // Find a folder name that doesn't exist yet. Append number if necessary.
  folderName = folderBaseName;
  int count = 1;
  while (System.IO.Directory.Exists (folderName)) {
    folderName = folderBaseName + count;
    count++;
  }
  System.IO.Directory.CreateDirectory (folderName); // Create the folder
}

void WriteScreenImageToTexture (Texture2D tex){
  tex.ReadPixels (new Rect (0, 0, screenWidth, screenHeight), 0, 0);
  tex.Apply ();
}

void CalculateOutputTexture (){
  Color color;
  for (int y = 0; y < textureTransparentBackground.height; ++y) {
  // each row
    for (int x = 0; x < textureTransparentBackground.width; ++x) {
      // each column
      float alpha = textureWhite.GetPixel (x, y).r - textureBlack.GetPixel (x, y).r;
      alpha = 1.0f - alpha;
      if (alpha == 0) {
        color = Color.clear;
      }
      else {
        color = textureBlack.GetPixel (x, y) / alpha;
      }
      color.a = alpha;
      textureTransparentBackground.SetPixel (x, y, color);
    }
  }
}

void SavePng (){
  string name = string.Format ("{0}/{1:D04} shot.png", folderName, videoFrame);
  var pngShot = textureTransparentBackground.EncodeToPNG ();
  File.WriteAllBytes (name, pngShot);
}

void CacheAndInitialiseFields (){
  originalTimescaleTime = Time.timeScale;
  screenWidth = Screen.width;
  screenHeight = Screen.height;
  textureBlack = new Texture2D (screenWidth, screenHeight, TextureFormat.RGB24, false);
  textureWhite = new Texture2D (screenWidth, screenHeight, TextureFormat.RGB24, false);
  textureTransparentBackground = new Texture2D (screenWidth, screenHeight, TextureFormat.ARGB32, false);
  }
}
Once you have imported this script into your Unity project we are ready to begin.
This script is likely to cause compilation issues when building for Unity Playworks Plugin, once you have finished baking your particles be sure to either exclude it from the build or remove it from your project folder.
Baking your Particle System(s)
One thing to note before we begin, you can layer multiple particle systems within the same scene to create one animation containing all of them.
- Create a fresh Unity scene containing a camera, and the particle system(s) you wish to bake.
- Add the TransparentBackgroundScreenshotRecorder script onto the scene's camera, and set the camera's Clear Flags field to Solid Color.
- Within the inspector you can set your desired frameRate and total number of frames to screenshot.
The higher the values set here will increase the screenshots and thusly the space taken up by the animation. 24 FPS is a good target, as playables usually average 30 FPS, but keep in mind how long your particle takes to finish when deciding for yourself.
- Position your particle system(s) so that they will be rendered by the camera, and set a resolution for your camera that fits.
- Turn on "Maximise on Play" within the game window in Unity. 6. Play your scene, screenshots will be saved to YourUnityProject/Screenshots by default.
If you plan to work within the same scene going forward, be sure to disable or remove the script from the camera otherwise the capture process will begin again next time you hit play!
Converting to an animation
Before starting this process, be sure to check the screenshots taken to see if they are to your liking. If not you can always delete the folder, go back to the previous process, tweak the FPS / Frames to Capture / Resolution and try again.
- Import the screenshots taken into your Unity project folder.
- Convert these images into Sprites via the Import Settings.
- Select all the sprites you wish to include in the animation, and drag them into the scene all at once.
- An animation will be generated and you will be asked to assign a name.
And done! You have successfully converted your particle system into an animation! You can now go about replacing the existing particle system in your playable scene with this animation, as well as make any tweaks you'd like to the animation itself.
Pros and cons
| Pros | Cons |
|---|---|
| Faster performance. | Typically larger file-size and thus more memory usage. |
| The original particles can be high quality, and still end up looking the same in Unity Playworks Plugin as it did in Unity. | The baked animation is always the same, to get variety you would need to have a couple of different renders. |
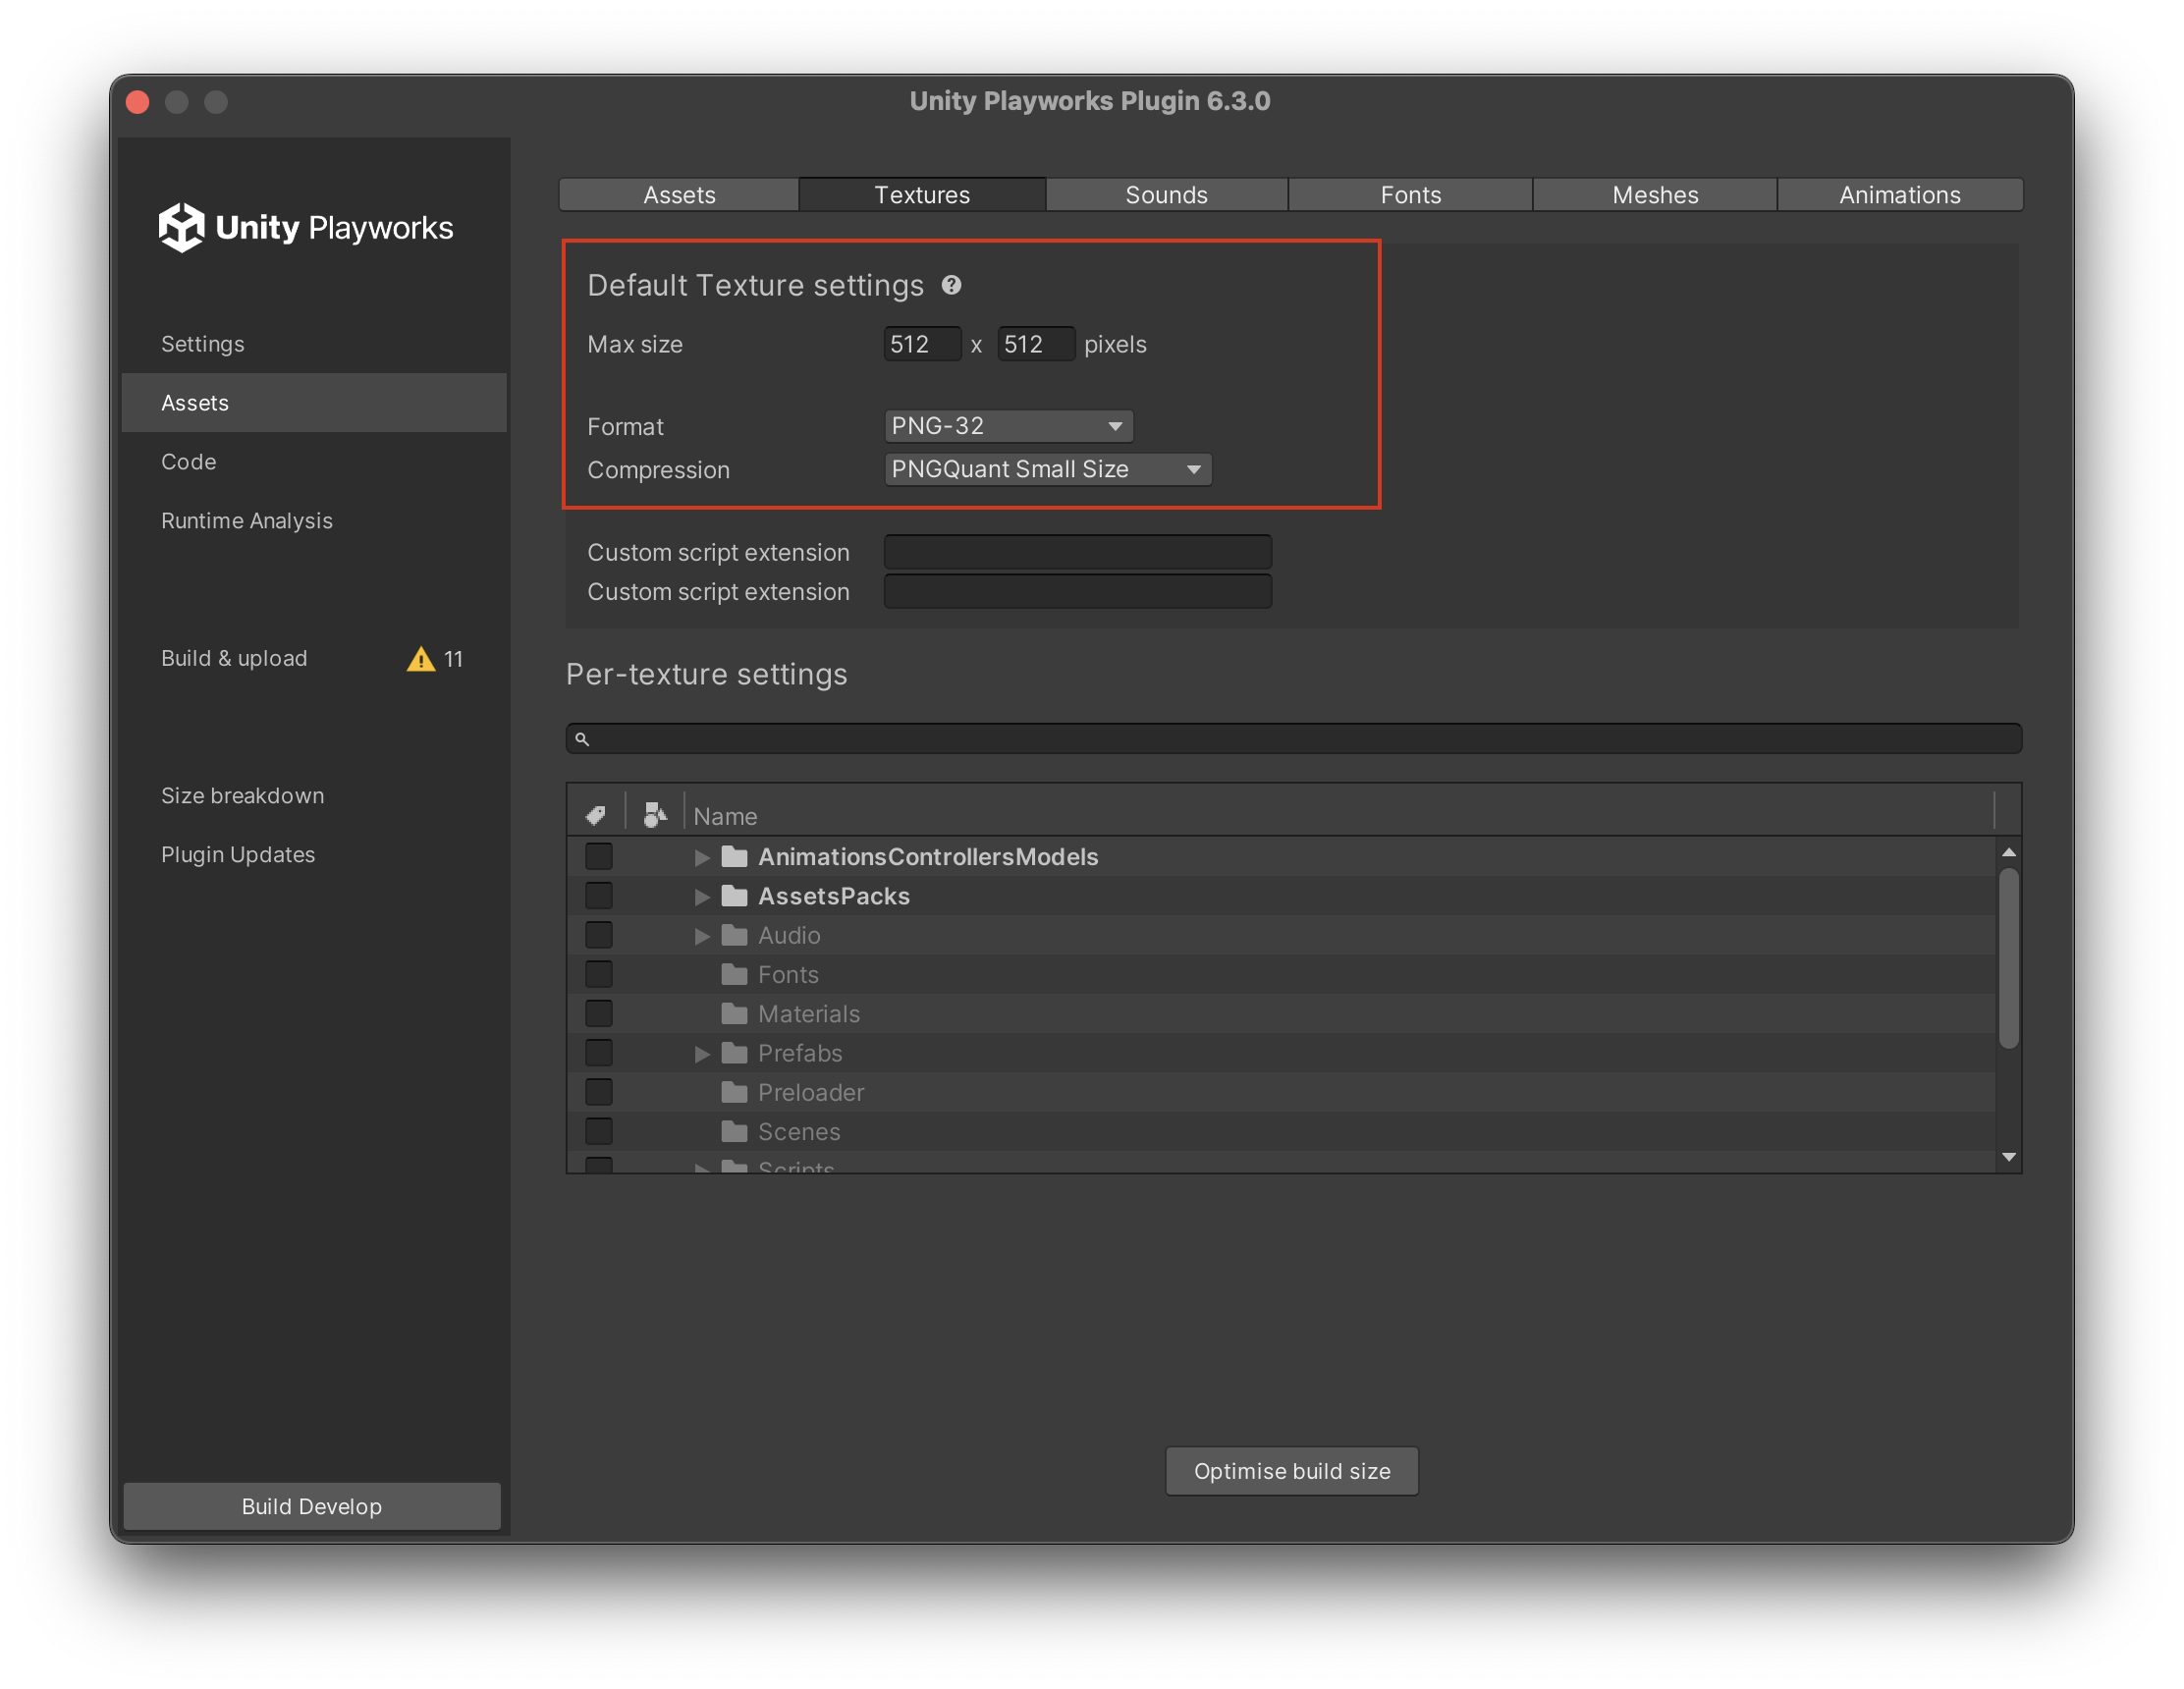
Solving the file size increase
With the increased file size we need to make sure we also optimise these new assets.
The quick fix is to use the PNG format. We can start with these settings as we can still optimise the PNG size by up-to 50% while keeping the quality of the images:
Reducing Particle Complexity
Some particle systems may contain effects that wouldn't work if baked due to how they function, like a trailing smoke effect.
In these cases it may instead be better to reduce the complexity of the effects that cannot be baked, whilst baking the parts of the particle that can be.
To reduce particle complexity you can cut the amount of emitted particles by however much you deem to be visually viable.
Removing Small Particle Details
If your particle systems contain small details, like slight changes to color and size over time, it may be an idea to cut these features from the particle system entirely.
Many users will likely not notice small details during their 15-20 seconds of playtime, but they can however affect performance, which is something a player is much more likely to notice.